Here it is!
Sadly, we didn't have the before pictures we thought we had, so we had to go with the only one we could find. It's not a great shot, but you get the jist right? HID-EEEEE-OUS !!!!
Sadly, we didn't have the before pictures we thought we had, so we had to go with the only one we could find. It's not a great shot, but you get the jist right? HID-EEEEE-OUS !!!!
Keep in my that I am 110% junker by professional choice, so the decor in the shots are things I have around the house and use in re-purposing projects or for sale on my website. (sadly no I don't ship .. yet)
So here is the dreadful before shot!

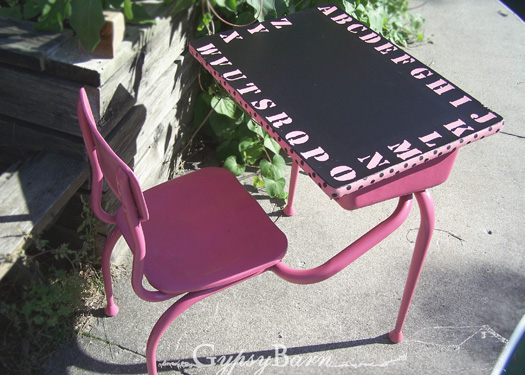
And Here are the after shots. The progress photos will be added below.
And HUGE thank you to Glimpse Imaging.ca
for helping me decorate and do the photos!
for helping me decorate and do the photos!


Now, hopefully we have caught your attention to see all the in between involved!
Basically, you know the beginning stages,
GUT, DEMO, DESTROY!
And then of course, patch up any holes with some drywall mud and sand them down nice and smooth.
Now for the fun part.
The "panels" on the walls were created by cutting down to size some mirror backings.
Or sign backings, picture backings, even dresser backings would work!
As long as it is thin.I'm sure if you had some old lathe from some plaster walls,
they could be cleaned up and used for a thicker look.
We're contemplating that for the downstairs "closet bathroom"
So here we go -
Step 1 after walls are fixed and primed......
add your strips of panel.

Now, here are the shots side by side, so you can see that that is indeed what I used.
I cut them on a table saw and used a little glue and a nail gun to attach them to the wall.
Expense #1 - Nails and Glue. - $10.00

I then made sure to caulk the exposed edges of allllllllllllllllllllllllllllll the trim.
This is a crucial step.
This is being done in a bathroomm - which means a lot of moisture,
and this board would suck that right up and warp. So seal any exposed edge!
Caulk - $4.00

Now, you get yourself a mighty fine manicure between all the primer, paint and caulking.
I think a Free DIY sexy manicure like this should knock the expense list down shouldnt it?

Next step. Prime with a GOOD primer, especially in bathrooms and then paint!
Now if you are like me, which most well planned people aren't, you will paint half the room bright yellow, sit back and look at it, then go nahhhhhhhhhhhh and choose a new colour!
I chose grey.
It was a can that has been laying around here forever waiting to find a use.
It was a can that has been laying around here forever waiting to find a use.
I never pay for paint that I use in my home renos. I always take other peoples left overs.
No need to throw it the landfill or any other means, I can use it somewhere!
P.s. I had to include this shot.
When painting over the door, the back of the door hanger makes an
excellent extra set of hands to hold the paint can!

The mirror in the picture - well, it came from a dresser that was on the side of the road.
I just painted it the same white I used on the bottom half of the bathroom!
Voila!
Voila!
Yes ... that's it.
It's not as big of a job as you would think.
It's not as big of a job as you would think.
I did this in 4 days - while on bed rest for pneumonia!
I laughed at the doctor when he said - GO GET REST!
I'm sure it will come back and kick me in the butt again ... but at least my bathroom is done!
Now, where did the other $134.00 expense come from you ask?
Floor, Sink, Toilet, light fixture.
Floor, Sink, Toilet, light fixture.
Let me just say this -
If you see any store - and I mean ANY store with a Going out of Business sale
or a Moving Sale
Ask them for their floor model demos!
I don't want to tell you how much we didnt pay for the sink and toilet ....
because, well, I don't want to make you jealous! HA! But it was a friggin steal!
Ask for demos, ask for bundled discounts and open box deals!
They will never tell you.... you have to ask!
The floor and light fixture were just some little quickie yardsale pickups. I haven't decided on permanent flooring yet, so this will do for now!
And that is that in a nut shell!
I'm sure you have a lot of questions, but I hope not.
But I have 11 more rooms to redo ... all looking as bad as that ...... so a lot more to come!
And when I'm not *ill*
I will take more pictures as I go. But this was a full steam ahead, just get it done and relax project!
One Last Peek!
*In Hind Sight, painting the strip before you put them on the wall is MUCH more intelligent and time saving!
I blame medicine head for not letting me do that. But still CAULK!
Until next time!